


Have you ever wondered how to access your home laptop from outside your house? Whether you’re traveling for work or on vacation, being able to remotely access your laptop can be incredibly convenient. In this article, we’ll explore different methods and tools that you can use to easily connect to your home laptop and access all your files and programs, no matter where you are. So get ready to learn how to stay connected to your personal computer, even when you’re miles away.
Understanding Remote Access
What is Remote Access?
Remote access refers to the ability to access and control your home laptop or computer from a remote location using another device, such as a smartphone, tablet, or another computer. With remote access, you can effectively use your home laptop as if you were physically present, accessing files, programs, and even controlling the desktop remotely.
Why would you need to remotely access your home laptop?
There are various reasons why you may need to remotely access your home laptop. Here are a few common scenarios:
Accessing files and documents: You may need to access important files, documents, or photos on your home laptop while you are away. Remote access allows you to retrieve these files from anywhere, eliminating the need to carry them physically.
Running programs or software: There might be instances where you need to run specific software or programs installed on your home laptop, but you are unable to do so on the device you have with you. With remote access, you can run these programs remotely on your home laptop.
Troubleshooting and technical support: If you encounter any technical issues with your home laptop while you are away, remote access enables you to troubleshoot problems without relying on someone physically present at your location.
Security and surveillance: Remote access can be beneficial for monitoring and securing your home. By remotely accessing your laptop, you can view security camera feeds, monitor activities, and even control home automation systems.
What are the advantages of remote access?
Remote access offers several advantages that make it a valuable tool for many individuals. Some of these advantages include:
Convenience: Remote access allows you to access your home laptop from anywhere with an internet connection. Whether you’re traveling, at work, or simply in another room, you can connect to your laptop and retrieve any necessary files or programs.
Productivity: With remote access, there’s no need to carry a physical copy of important files or rely on cloud storage. You can access everything directly from your home laptop, enabling you to be productive and work efficiently.
Flexibility: Remote access provides the flexibility to work on your home laptop even if you’re not physically present. This is especially useful for individuals who need to access their work files or continue tasks from a different location.
Cost savings: By leveraging remote access, you can avoid investing in multiple devices or software licenses. Instead, you can utilize your home laptop for various purposes by accessing it remotely.
Setting Up Remote Desktop Connection
Check if your operating system supports Remote Desktop Connection
Before setting up remote desktop connection, it’s crucial to verify if your operating system supports this feature. Remote Desktop Connection is primarily available on Windows operating systems, including Windows 10, Windows 8, and Windows 7 Professional, Ultimate, or Enterprise editions.
Enable Remote Desktop on your home laptop
To enable Remote Desktop on your home laptop, follow these steps:
Windows 10: Go to “Settings” and select “System.” Click on “Remote Desktop” and toggle the switch to “On.” You may need to adjust additional settings depending on your preference.
Windows 8: Press the Windows key + X combination on your keyboard to open the Power User menu. Select “System.” Click on “Remote Settings” and choose “Allow remote connections to this computer.”
Windows 7: Click on the “Start” button, right-click on “Computer,” and select “Properties.” From the left-hand side, click on “Remote settings,” and under the “Remote Desktop” section, select “Allow connections from computers running any version of Remote Desktop.”
Configure your router for Remote Desktop Connection
To configure your router for Remote Desktop Connection, you will need to set up port forwarding. Port forwarding ensures that incoming connections to a specific port on your router are directed to your home laptop. Here’s a general guideline to configure port forwarding:
Determine your router’s IP address: Open a web browser and enter your router’s IP address in the address bar. Refer to your router’s documentation or contact your internet service provider for assistance.
Top Rated TP-Link AX1800 WiFi 6 Router for Fast InternetExperience next-gen internet connectivityThis router delivers dual-band WiFi 6 speeds of up to 1.8 Gbps, allowing you to connect multiple devices without congestion, ensuring smooth streaming and gaming.
Access your router’s settings: Enter the router’s username and password to access the settings. If you’re unsure about the login credentials, consult your router’s documentation or contact your internet service provider.
Locate the port forwarding settings: The location of the port forwarding settings may vary depending on your router model. Look for options such as “Port Forwarding,” “Virtual Server,” or “Applications and Gaming.”
Configure port forwarding: Set up port forwarding by specifying the port range and the IP address of your home laptop. The specific configuration steps will depend on your router’s interface.
Save and apply the settings: After configuring port forwarding, save the settings and allow your router to apply the changes. Your router will now forward incoming connections to the designated port on your home laptop.
It’s important to note that the process may vary depending on your router model. For detailed instructions, consult your router’s documentation or contact your router manufacturer’s support.

Using TeamViewer for Remote Access
Install TeamViewer on your home laptop
To use TeamViewer for remote access, you first need to install it on your home laptop. Follow these steps to install TeamViewer:
Visit the TeamViewer website: Open a web browser and go to the official TeamViewer website.
Download TeamViewer: On the TeamViewer website, locate the “Download TeamViewer” button and click on it. Select the appropriate version (Windows, macOS, or Linux) for your home laptop and download the installer file.
Run the installer: Once the installer file is downloaded, locate it in your downloads folder or the specified location. Double-click on the file to run the installer.
Follow the installation wizard: The installation wizard will guide you through the setup process. Review the license agreement, select the installation options according to your preference, and proceed with the installation.
Launch TeamViewer: After the installation is complete, TeamViewer will launch automatically. Take note of the “Your ID” and “Password” displayed on the main screen as you will need this information to connect to your home laptop remotely.
Create a TeamViewer account
Creating a TeamViewer account is optional but recommended as it provides additional features and convenience. To create a TeamViewer account, follow these steps:
Open TeamViewer: Launch the TeamViewer application on your home laptop.
Click on “Computers & Contacts”: In the TeamViewer interface, click on the “Computers & Contacts” tab located on the left-hand side.
Click on “Sign up for a free account”: On the “Computers & Contacts” tab, you will see the option to sign up for a free TeamViewer account. Click on it.
Follow the registration process: The registration process will involve providing an email address, setting a password, and verifying your email address. Follow the instructions provided on the TeamViewer website to complete the registration.
Install TeamViewer on the device you will use to access your laptop remotely
To access your laptop remotely using TeamViewer, you need to install the TeamViewer software on the device you will be using. Follow these steps to install TeamViewer:
Visit the TeamViewer website: Open the web browser on your remote device and go to the TeamViewer website.
Download TeamViewer: On the TeamViewer website, locate the “Download TeamViewer” button and click on it. Select the appropriate version (Windows, macOS, Linux, Android, or iOS) for your remote device and download the installer file.
Install TeamViewer: Once the installer file is downloaded, locate it on your device and run the installer. Follow the installation instructions provided by TeamViewer.
Launch TeamViewer: After the installation is complete, launch TeamViewer on your remote device.
Log in to your TeamViewer account: If you created a TeamViewer account, log in using your email address and password. If you did not create an account, you can proceed without logging in.
Enter the TeamViewer ID and Password: On the remote device, enter the TeamViewer ID and Password displayed on your home laptop to establish a connection. This will allow you to access your home laptop remotely.
Utilizing Chrome Remote Desktop
Adding the Chrome Remote Desktop extension to Google Chrome on your home laptop
Chrome Remote Desktop is a convenient tool for remote access that integrates directly with the Google Chrome browser. Follow these steps to add the Chrome Remote Desktop extension to Google Chrome on your home laptop:
Open Google Chrome: Launch the Google Chrome browser on your home laptop.
Visit the Chrome Web Store: In the URL bar, type “chrome://extensions” and press Enter. This will take you to the Chrome Web Store.
Search for Chrome Remote Desktop: In the Chrome Web Store search bar, type “Chrome Remote Desktop” and press Enter.
Select the Chrome Remote Desktop extension: From the search results, click on the “Add to Chrome” button next to the Chrome Remote Desktop extension.
Confirm the installation: A pop-up window will appear, asking you to confirm the installation. Click on “Add extension” to proceed.
Installing Chrome Remote Desktop on the device you will use to access your laptop remotely
To access your laptop remotely using Chrome Remote Desktop, you will need to install it on the device you will be using. Follow these steps to install Chrome Remote Desktop:
Open Google Chrome: Launch the Google Chrome browser on your remote device.
Visit the Chrome Web Store: In the URL bar, type “chrome://extensions” and press Enter. This will take you to the Chrome Web Store.
Search for Chrome Remote Desktop: In the Chrome Web Store search bar, type “Chrome Remote Desktop” and press Enter.
Select the Chrome Remote Desktop extension: From the search results, click on the “Add to Chrome” button next to the Chrome Remote Desktop extension.
Confirm the installation: A pop-up window will appear, asking you to confirm the installation. Click on “Add extension” to proceed.
Using Chrome Remote Desktop to connect to your home laptop
Once you have installed the Chrome Remote Desktop extension on both your home laptop and remote device, you can use it to establish a remote connection. Follow these steps:
Launch Chrome Remote Desktop: Open the Google Chrome browser on your remote device.
Trending NowFull-Sized Wireless Keyboard and Mouse ComboComfortable design for extended useThis ergonomic wireless combo offers a comfortable typing experience and stable connectivity, perfect for long work sessions without sacrificing performance.Open the Chrome Remote Desktop extension: Click on the extension icon located in the top right corner of the browser.
Select your home laptop: Under the “My Computers” section, you should see a list of available devices. Click on your home laptop’s name to initiate the connection.
Enter the PIN: If you have set up a PIN for your home laptop, you will be prompted to enter it for security purposes. Enter the correct PIN to continue.
Establish the connection: After entering the correct PIN, the remote connection will be established, and you should be able to see and control your home laptop’s desktop remotely.

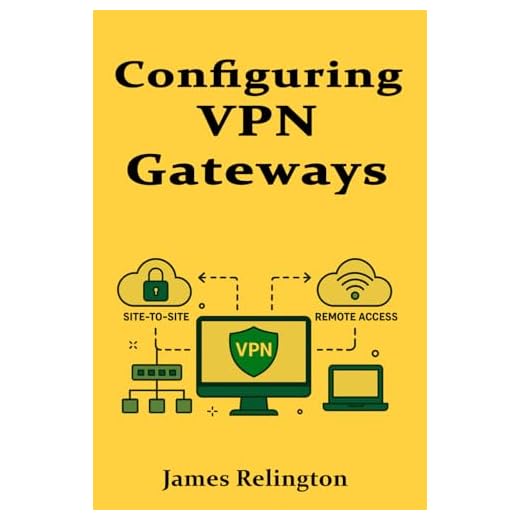
Setting Up VPN for Remote Access
Understanding the purpose and benefits of a VPN for remote access
A Virtual Private Network (VPN) provides a secure and encrypted connection between your remote device and your home network. It adds an extra layer of privacy and protection when accessing your home laptop remotely. The benefits of using a VPN for remote access include:
Enhanced security: A VPN encrypts your internet traffic, making it difficult for hackers or unauthorized individuals to intercept or access your data.
Privacy protection: With a VPN, your IP address is masked, providing anonymity and preventing websites and online services from tracking your location or online activities.
Bypassing restrictions: If certain websites or online services are restricted in your location, a VPN can help you bypass these restrictions by routing your internet traffic through a server in a different region.
Secure remote access: By using a VPN, you establish a secure and private connection to your home network, ensuring that your remote access sessions are protected from external threats.
Choosing a VPN service provider
When selecting a VPN service provider for remote access to your home laptop, consider the following factors:
Security features: Look for a VPN service provider that offers strong encryption protocols, kill switch functionality, and a strict no-logs policy.
Server locations: Ensure that the VPN provider has servers located in regions convenient for you, such as your home country or nearby countries.
Connection speed: Check the VPN provider’s reputation for fast and stable connections to ensure smooth remote access to your home laptop.
Compatibility: Verify that the VPN service provider supports your operating system and devices, including your home laptop and remote device.
Customer support: Consider the level of customer support provided by the VPN service provider, including availability, responsiveness, and the availability of troubleshooting resources.
Some popular VPN service providers include ExpressVPN, NordVPN, and CyberGhost. Research and compare different options to find the VPN service provider that best suits your needs.
Installing and configuring the VPN software on your home laptop and remote device
To set up a VPN for remote access to your home laptop, follow these general steps:
Subscribe to a VPN service: Choose a VPN service provider and subscribe to their service. Follow their instructions to create an account and receive your VPN credentials.
Top RatedORICO Remote Storage for Secure Data AccessAPP-Connect with encrypted accessThis storage solution provides secure, easy access to your files via a dedicated app, making data management effective for teams and individuals alike.Download the VPN software: On your home laptop, visit the VPN service provider’s website and download the appropriate VPN software for your operating system.
Install the VPN software: Locate the downloaded VPN software on your home laptop and run the installer. Follow the installation instructions provided by the VPN service provider.
Launch the VPN software: After the installation is complete, launch the VPN software on your home laptop.
Enter your VPN credentials: Enter the VPN credentials provided by your VPN service provider. This typically includes your username and password.
Connect to a VPN server: Select a VPN server preferably located in your home country or region from the available server list. Click on “Connect” to establish a VPN connection.
Configure VPN settings: Depending on your VPN service provider, you may have additional settings available for configuration. Explore the settings to customize your VPN experience, such as protocol selection or enabling a kill switch.
Repeat the above steps on your remote device to install and configure the VPN software for remote access. Ensure that you select the same VPN server and use the same credentials on both your home laptop and remote device to establish a secure connection.
Configuring Remote Access with Windows Remote Assistance
Enable Windows Remote Assistance on your home laptop
Windows Remote Assistance allows another user to connect to your home laptop and provide assistance or troubleshoot issues remotely. To enable Windows Remote Assistance, follow these steps:
Open the Control Panel: Click on the “Start” button and search for “Control Panel.” Open the Control Panel from the search results.
Navigate to System and Security: In the Control Panel, click on the option “System and Security.”
Open System: Within the “System and Security” section, locate the “System” link and click on it.
Enable Remote Assistance: On the left-hand side of the “System” window, click on the option “Remote settings.” Under the “Remote Assistance” section, select the option “Allow Remote Assistance connections to this computer.”
Generating an invitation to connect with Windows Remote Assistance
To enable remote access using Windows Remote Assistance, you will need to generate an invitation file for the remote user to connect. Follow these steps:
Open Windows Remote Assistance: Press the Windows key + R combination on your keyboard to open the Run dialog box. Type “msra” and press Enter to launch Windows Remote Assistance.
Select “Invite someone you trust to help you”: In the Windows Remote Assistance window, select the option “Invite someone you trust to help you.”
Generate an invitation: Choose the option “Use email to send an invitation” or “Save this invitation as a file.” Follow the prompts to complete the process, including entering the email address of the remote user, setting an expiration date for the invitation, and specifying a password if desired.
Send the invitation: Share the generated invitation file or send the invitation email to the remote user. Make sure to communicate any necessary instructions, such as the password if one was set.
Accepting and establishing a remote assistance connection
To establish a remote assistance connection using the invitation file or email, the remote user needs to follow these steps:
Open Windows Remote Assistance: On the remote device, have the user open the Windows Remote Assistance application.
Accept the invitation: Select the appropriate option for accepting a remote assistance invitation. This may involve opening the invitation file or clicking on the provided link in the invitation email.
Enter the password: If a password was set when generating the invitation, the remote user will need to enter the password to establish the connection.
Establish the remote assistance connection: Once the invitation is accepted and the password is entered (if applicable), the remote assistance connection will be established. The remote user will be able to view and control your home laptop remotely to provide assistance or carry out troubleshooting.
Using Remote Access Apps for Mobile Devices
Exploring remote access apps available for mobile devices
There are several remote access apps available for mobile devices that allow you to connect to your home laptop remotely. Some popular options include:
TeamViewer: TeamViewer offers a mobile app for both Android and iOS devices, allowing you to connect to your home laptop and control it remotely.
Chrome Remote Desktop: Chrome Remote Desktop has a mobile app for Android and iOS, enabling you to access your home laptop through your mobile device.
Microsoft Remote Desktop: Microsoft Remote Desktop is available for both Android and iOS devices and allows you to connect to your home laptop remotely, particularly if your home laptop runs on a Windows operating system.
Downloading and installing a remote access app on your home laptop and remote device
To use a remote access app for connecting to your home laptop remotely, you will need to download and install the relevant app on both your home laptop and remote device. Follow these steps:
Open your device’s app store: On your home laptop and remote device, open the respective app store (such as Google Play Store for Android or the App Store for iOS).
Search for the remote access app: In the app store, search for the remote access app you wish to use (such as TeamViewer, Chrome Remote Desktop, or Microsoft Remote Desktop).
Select and install the app: From the search results, select the desired remote access app and click on the “Install” or “Get” button to download and install the app on your device.
Launch the app: After installation is complete, launch the remote access app on both your home laptop and remote device.
Connecting to your home laptop from your mobile device using the remote access app
To connect to your home laptop from your mobile device using a remote access app, follow these general steps:
Launch the remote access app: Open the remote access app on your mobile device.
Trending NowRii Mini K25 Multifunction Wireless Remote ControlVersatile control for various devicesThis portable 3-in-1 remote combines a keyboard, mouse, and remote control, perfect for managing smart TVs and other devices with ease.Enter your credentials: Enter the necessary credentials, such as the ID or username associated with your home laptop, and any required passwords or access codes.
Initiate the connection: Tap on the “Connect” or “Connect to partner” button to initiate the connection to your home laptop.
Confirm the connection: If prompted, accept or confirm the connection on both your home laptop and mobile device.
Control your home laptop remotely: Once the connection is established, you can control your home laptop’s desktop and access files, programs, or perform any necessary actions remotely from your mobile device.

Securing Remote Access to Your Home Laptop
Using strong passwords for your home laptop and remote access accounts
To ensure the security of your remote access to your home laptop, it’s essential to use strong passwords. Follow these guidelines for creating strong passwords:
Length: Use passwords that are at least eight characters long. Longer passwords are generally more secure.
Complexity: Include a combination of uppercase and lowercase letters, numbers, and special characters in your password.
Avoid common patterns: Avoid using easily guessable patterns such as sequential numbers, patterns on the keyboard, or common words.
Avoid personal information: Do not use personal information, such as your name, birthdate, or address, in your password.
Unique passwords: Use unique passwords for your home laptop and your remote access accounts. Avoid reusing passwords across multiple platforms or services.
Regularly change passwords: Periodically change your passwords to maintain security, especially if there is a chance of a compromise.
Enabling two-factor authentication for added security
Two-factor authentication (2FA) provides an additional layer of security by requiring a second verification step, usually a code sent to your mobile device, in addition to your password. Enable 2FA for your remote access accounts, such as TeamViewer or VPN service provider accounts, to enhance security.
Each service provider may have a different process for enabling 2FA. Generally, the steps involve:
Access account settings: Log in to your remote access account and navigate to the account settings or security settings section.
Enable two-factor authentication: Look for the option to enable 2FA or two-step verification. Follow the instructions provided by the service provider to set up 2FA.
Verify your mobile device: Once enabled, you may be prompted to verify your mobile device by entering a code sent via SMS or through a mobile app authentication.
Configure backup access: Some service providers offer backup access methods, such as backup codes or alternate contact methods. Consider configuring these options to ensure you can still access your account if your primary device is unavailable.
Keeping your home network and connected devices secure
In addition to securing your remote access accounts, it’s crucial to ensure the overall security of your home network and all connected devices. Here are some best practices:

Update firmware and software: Regularly update your home laptop, router, and all connected devices with the latest firmware or software updates. These updates often include important security patches.
Use a firewall: Enable and configure a firewall on your home router to monitor and filter inbound and outbound network traffic, protecting your network from unauthorized access.
Secure your Wi-Fi network: Use strong Wi-Fi network encryption, such as the WPA2 protocol, and set a strong Wi-Fi password to prevent unauthorized access to your home network.
Disable unnecessary services and ports: Disable any unnecessary network services or open ports on your home laptop or router that could potentially be exploited by attackers.
Use antivirus software: Install reputable antivirus software on your home laptop and ensure it is regularly updated. Scan your laptop for malware and viruses to prevent security threats and vulnerabilities.
Regularly backup your data: Create regular backups of your important data to protect against data loss and potential security breaches. Choose secure backup methods, such as encrypted external hard drives or cloud storage.
By following these security practices, you can enhance the overall security of your home network and ensure that your remote access to your home laptop remains safe and protected.
Troubleshooting Remote Access Issues
Checking your internet connection and network settings
If you encounter issues with remote access, the first step is to check your internet connection and network settings. Follow these troubleshoot…