

If you’ve ever wondered about connecting your laptop to a TV or external monitor, this article is here to help you out. Whether you want to enjoy your favorite movies on a bigger screen or need to give a presentation at work, connecting your laptop to a TV or external monitor can be a game-changer. In this article, we’ll explore different methods and explain step-by-step how you can easily connect your laptop to a TV or external monitor. Let’s get started!

Understanding the Importance of Connectivity
Having the ability to connect your laptop to a TV or external monitor can significantly enhance your computing experience. Whether you are working on a project, watching movies, or playing games, a larger display can offer numerous advantages. In this article, we will explore the reasons to connect a laptop to a TV or external monitor and delve into the benefits of using a larger display.
Reasons to connect a laptop to a TV or external monitor
There are several reasons why connecting your laptop to a TV or external monitor can be beneficial. Firstly, a larger display provides more screen real estate, allowing you to view content with greater clarity and detail. This is particularly advantageous when working on graphic design projects, spreadsheets, or viewing photos and videos. Additionally, connecting your laptop to a larger display can create a more immersive gaming or movie-watching experience, as it brings visuals to life on a larger scale.
Furthermore, using an external monitor or TV can increase productivity by expanding your workspace. With a larger display, you can have multiple windows open simultaneously, making multitasking easier and more efficient. This is especially useful for professionals who rely on multiple programs or need to compare documents side by side.
Advantages of using a larger display
Using a larger display offers numerous advantages over solely relying on your laptop’s built-in screen. One significant advantage is improved visibility. A larger display allows you to comfortably view content without straining your eyes or squinting.
Moreover, a larger display enhances the overall visual experience. Whether you are watching movies, playing games, or browsing the web, the larger screen size provides a more immersive and engaging experience. Colors appear more vibrant, details become more pronounced, and the overall enjoyment is elevated.
Additionally, a larger display enables you to work more efficiently and effectively. With the added screen real estate, you can have multiple windows open simultaneously without feeling cramped. This makes it easier to multitask, switch between applications, and stay organized.
Determining the Available Ports
Before connecting your laptop to a TV or external monitor, it’s essential to determine the available ports on both devices. Different laptops and monitors may have various ports, and understanding them is crucial for a successful connection.
Identification of different ports on a laptop
Laptops generally come equipped with a variety of ports, each serving a specific purpose. Some common ports found on laptops include:
- HDMI (High-Definition Multimedia Interface): HDMI ports transmit both high-definition video and audio signals.
- VGA (Video Graphics Array): VGA ports are analog and transmit video signals only. They are commonly found on older laptops.
- DVI (Digital Visual Interface): DVI ports can transmit both digital and analog video signals. However, they do not carry audio signals.
- DisplayPort: DisplayPort is a digital port that supports high-definition video and audio. It is commonly found on newer laptops.
- USB-C/Thunderbolt 3: USB-C or Thunderbolt 3 ports offer versatile connectivity options and can transmit video, audio, and data signals.
By identifying the ports available on your laptop, you can determine the suitable connection cable and compatibility with the TV or external monitor.
Understanding common ports on a TV or external monitor
Similar to laptops, TVs and external monitors also feature different ports to accommodate various devices. Some common ports found on TVs and external monitors include:
- HDMI: HDMI ports are the most common and widely used ports on TVs and monitors, supporting both video and audio signals.
- VGA: VGA ports are typically found on older displays and can transmit video signals only.
- DVI: DVI ports can transmit both digital and analog video signals, but they do not carry audio signals.
- DisplayPort: DisplayPort is becoming increasingly popular, especially in newer monitors and high-end TVs. It supports high-definition video and audio.
- USB-C/Thunderbolt 3: Some modern TVs and monitors may also feature USB-C or Thunderbolt 3 ports, allowing for versatile connectivity options.
It’s essential to identify the available ports on your TV or external monitor to ensure compatibility with your laptop and choose the appropriate connection cable.
Choosing the Right Connection Cable
Once you have identified the ports on both your laptop and TV or external monitor, selecting the right connection cable becomes crucial. Different types of cables cater to various port combinations and ensure a seamless connection.
Description of different types of cables
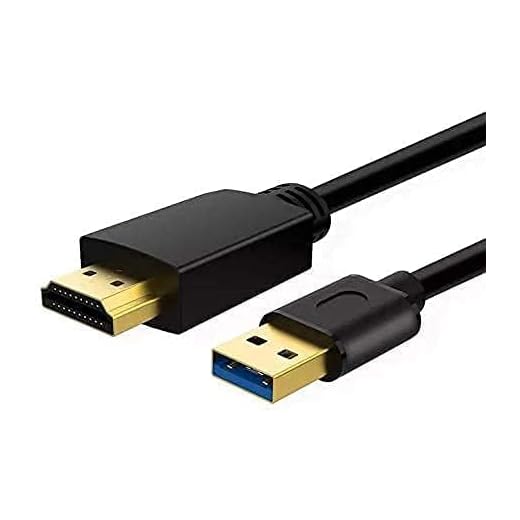
- HDMI cable: HDMI cables are the most commonly used cables, offering excellent video and audio quality. They can transmit high-definition signals and are compatible with HDMI ports found on most laptops, TVs, and external monitors.
- VGA cable: VGA cables transmit analog video signals and are suitable for older laptops and displays. However, they do not carry audio signals. VGA cables are gradually being replaced by modern digital connections.
- DVI cable: DVI cables can transmit both digital and analog video signals but do not support audio. They are commonly used for connecting older equipment or devices that lack HDMI ports.
- DisplayPort cable: DisplayPort cables are widely used for transmitting high-quality video and audio signals. They offer excellent compatibility with DisplayPort-enabled devices.
- USB-C/Thunderbolt 3 cable: USB-C or Thunderbolt 3 cables provide versatile connectivity options, allowing for the transmission of video, audio, and data signals. They are suitable for laptops and external monitors that support USB-C or Thunderbolt 3 connections.
Choosing the cable according to the available ports
To ensure a successful connection, choose a cable that aligns with the available ports on your laptop, TV, or external monitor. For example, if both your laptop and external monitor have HDMI ports, an HDMI cable would be the ideal choice. However, if you have a VGA port on your laptop and a DVI port on the monitor, a VGA to DVI cable would be necessary.
By selecting the appropriate connection cable, you can facilitate a reliable and high-quality connection between your laptop and the external display.
Setting-Up Hardware Connections
Once you have selected the appropriate cable based on the available ports, the next step is to set up the hardware connections between your laptop and the TV or external monitor. Following a step-by-step guidance can help you accomplish this task seamlessly while ensuring proper connectivity.
Step by step guidance to connect the cable
- Power off both your laptop and TV or external monitor.
- Insert one end of the chosen cable into the appropriate port on your laptop.
- Insert the other end of the cable into the corresponding port on the TV or external monitor.
- Power on both your laptop and TV or external monitor.
- Use the remote control or on-screen menu of the TV or external monitor to select the correct input source.
Following these steps will establish a hardware connection between your laptop and the TV or external monitor, allowing you to utilize the larger display for an enhanced computing experience.
Safety precautions during the setup
While setting up hardware connections, it is essential to observe certain safety precautions to avoid any damage or accidents. Here are some key safety measures to follow:
- Ensure that all devices are powered off before making any connections.
- Handle the cable and ports with care, avoiding any undue force or bending that may cause damage.
- Always insert the cable straight into the ports without applying excessive pressure.
- Avoid placing any objects on top of the cable or bending it at extreme angles, as this can potentially damage the cable or the port.
By adhering to these safety precautions, you can mitigate any risks and safeguard both your laptop and the TV or external monitor during the setup process.

Using HDMI to Connect
HDMI (High-Definition Multimedia Interface) is one of the most popular and widely used connections for connecting laptops to TVs or external monitors. It offers excellent video and audio quality, making it an ideal choice for a seamless connection.
Instructions for setting up HDMI connection
To connect your laptop to a TV or external monitor using HDMI, follow these simple steps:
- Power off your laptop and the TV or external monitor.
- Locate the HDMI port on your laptop and the corresponding HDMI port on the TV or external monitor.
- Insert one end of the HDMI cable into the HDMI port on your laptop.
- Insert the other end of the HDMI cable into the HDMI port on the TV or external monitor.
- Power on both your laptop and the TV or external monitor.
- Use the remote control or on-screen menu of the TV or external monitor to select the correct HDMI input source.
By following these instructions, you can establish an HDMI connection between your laptop and the TV or external monitor, allowing you to enjoy a larger screen and enhanced multimedia experience.
Troubleshooting common HDMI issues
In some cases, you may encounter common HDMI issues when attempting to connect your laptop to a TV or external monitor. Here are some troubleshooting tips to overcome these problems:
No display on the TV or external monitor: Ensure that the correct HDMI input source is selected on the TV or external monitor. Additionally, check that the HDMI cable is securely plugged into both devices. Restarting both the laptop and the TV or external monitor may also help establish the connection.
No audio on the TV or external monitor: Verify that the audio settings on your laptop are correctly configured and set to output audio through HDMI. You may need to go to the sound settings and select the HDMI output as the default audio device. Additionally, ensure that the volume is not muted on both the laptop and the TV or external monitor.
Poor or distorted video quality: Check that the HDMI cable is in good condition and not damaged. Sometimes, issues with the cable may result in poor video quality. Additionally, make sure that the display settings on your laptop are appropriately configured, and the resolution is set to match the capabilities of the TV or external monitor.
By troubleshooting these common HDMI issues, you can resolve connectivity problems and enjoy a seamless experience when connecting your laptop to a TV or external monitor.
Using VGA to Connect
While HDMI has become the standard for connecting modern laptops to TVs or external monitors, VGA (Video Graphics Array) connections are still prevalent, especially on older devices. Although VGA does not carry audio signals, it can still provide a reliable video connection.
Guidance on setting up VGA connection
To connect your laptop to a TV or external monitor using a VGA connection, follow these steps:
- Power off your laptop and the TV or external monitor.
- Locate the VGA port on your laptop and the corresponding VGA port on the TV or external monitor.
- Insert one end of the VGA cable into the VGA port on your laptop.
- Insert the other end of the VGA cable into the VGA port on the TV or external monitor.
- Power on both your laptop and the TV or external monitor.
- Use the remote control or on-screen menu of the TV or external monitor to select the correct VGA input source.
By following these instructions, you can connect your laptop to a TV or external monitor using a VGA connection, allowing you to utilize a larger display for various tasks.
Common problems and solutions with VGA connection
When using a VGA connection, you may encounter a few common problems that can affect the overall display experience. Here are some common problems and their possible solutions:
Blurred or fuzzy display: Ensure that the VGA cable is firmly connected to both your laptop and the TV or external monitor. Sometimes, a loose connection can result in a blurry display. Additionally, check the display settings on your laptop and adjust the resolution to match the capabilities of the TV or external monitor.
No display on the TV or external monitor: Verify that the correct VGA input source is selected on the TV or external monitor. If the display remains blank, try restarting both your laptop and the TV or external monitor. It is also advisable to check the VGA cable for any signs of damage and replace it if necessary.
Screen flickering or unstable display: Check that the VGA cable is free from any interference or damage. Sometimes, faulty cables can cause flickering or an unstable display. If possible, try using a different VGA cable to see if the issue persists. Additionally, ensure that the display settings on your laptop are properly configured.
By addressing these common problems, you can troubleshoot VGA connection issues and enjoy a stable and clear display when using your laptop with a TV or external monitor.

Using DVI to Connect
DVI (Digital Visual Interface) connections offer a versatile option for connecting laptops to monitors or TVs, particularly when HDMI or VGA connections are not available. Although DVI does not support audio signals, it can provide a high-quality video connection.
Instructions for setting up DVI connection
To connect your laptop to a TV or external monitor using a DVI connection, follow these steps:
- Power off your laptop and the TV or external monitor.
- Locate the DVI port on your laptop and the corresponding DVI port on the TV or external monitor.
- Insert one end of the DVI cable into the DVI port on your laptop.
- Insert the other end of the DVI cable into the DVI port on the TV or external monitor.
- If using a DVI-to-HDMI adapter, connect the HDMI cable to the adapter and then to the TV or external monitor.
- Power on both your laptop and the TV or external monitor.
- Use the remote control or on-screen menu of the TV or external monitor to select the correct input source.
Following these instructions will establish a DVI connection between your laptop and the TV or external monitor, enabling you to enjoy a larger display for various purposes.
Resolving common issues with DVI connection
While using a DVI connection, you may encounter certain issues that can affect the overall viewing experience. Here are some common problems and their possible solutions:
No display on the TV or external monitor: Verify that the correct input source is selected on the TV or external monitor. Check that the DVI cable is securely plugged into both your laptop and the TV or external monitor. If the display remains blank, try restarting both the laptop and the TV or external monitor. It is also advisable to check the DVI cable for any signs of damage and replace it if necessary.
Poor or distorted video quality: Ensure that the DVI cable is in good condition and not damaged. Faulty cables can result in poor video quality. Additionally, confirm that the resolution settings on your laptop are appropriately configured, matching the capabilities of the TV or external monitor.
By troubleshooting these common issues associated with DVI connections, you can establish a reliable connection and enjoy a clear and crisp display when connecting your laptop to a TV or external monitor.
Configuring the Laptop for the External Display
Once you have successfully established the hardware connections between your laptop and the external display, it’s important to configure the laptop settings to ensure optimal output on the larger screen.
Adjusting laptop settings for output display
To adjust the laptop settings for the external display, follow these steps:
Right-click anywhere on your laptop’s desktop and select “Display settings” from the context menu.
In the display settings, you will see options for multiple displays. Choose the appropriate settings based on your preferences:
- Extend these displays: This option allows you to extend your laptop’s display onto the external monitor or TV, effectively expanding your workspace.
- Duplicate these displays: Selecting this option mirrors your laptop’s display on the external monitor or TV, showing the same content on both screens.
- Show only on X: This option displays the content solely on your laptop’s screen or the external monitor/TV, depending on the chosen display.
After selecting the desired display setting, you can further customize the display by adjusting the screen resolution and orientation. In the display settings, click on the “Advanced display settings” and choose the appropriate resolution and orientation from the available options.
By adjusting these settings, you can optimize the output on the external display, tailor it to your needs, and maximize your overall computing experience.
Using Wi-Fi to Connect Wirelessly
In addition to wired connections, many laptops and external displays offer the ability to connect wirelessly, eliminating the need for cables. This wireless connectivity can be achieved through technologies like Miracast for Windows and AirPlay for Mac.
Using Miracast for Windows
Miracast is a wireless display technology that allows you to mirror or extend your Windows laptop’s screen onto a compatible TV or external monitor without the need for cables. To use Miracast, both your laptop and the external display must support this technology. Here’s how to set it up:
- Ensure that your laptop and the TV or external monitor support Miracast. Check the user manuals or manufacturer’s websites for compatibility information.
- Access the Action Center on your Windows laptop by clicking the speech bubble icon located in the bottom-right corner of the screen.
- In the Action Center, click on the “Connect” button.
- A list of available wireless display devices will appear. Select the TV or external monitor you want to connect to.
- Follow the on-screen instructions to complete the connection.
- Once connected, your laptop’s screen will be wirelessly mirrored or extended onto the TV or external monitor.
Using Miracast, you can enjoy the convenience of a wireless display connection, allowing you to move freely without the constraints of cables.
Using AirPlay for Mac
For Mac users, AirPlay provides a similar wireless display solution, allowing you to effortlessly connect your MacBook to an Apple TV or other compatible devices. Here are the steps to set up AirPlay:
- Ensure that your MacBook and the Apple TV or external display support AirPlay. Refer to the user manuals or manufacturer’s websites for compatibility details.
- On your MacBook, click on the AirPlay icon located in the menu bar (it looks like a rectangle with an arrow pointing up).
- A dropdown menu will appear, showing available devices. Select the Apple TV or external display you want to connect to.
- If prompted, enter the AirPlay code that appears on your TV or external monitor to establish the connection.
- Once connected, your MacBook’s screen will be wirelessly mirrored or extended onto the TV or external display.
Utilizing AirPlay, you can effortlessly connect your MacBook to an external display, eliminating the need for cables and enjoying the convenience of a wireless connection.
Guidance on setting up wireless connection
When setting up a wireless connection using methods like Miracast or AirPlay, it’s important to keep the following guidelines in mind:
- Ensure that both your laptop and the TV or external monitor support the respective wireless technology. Check compatibility details and system requirements before attempting to establish a wireless connection.
- Make sure that both devices are connected to the same Wi-Fi network. Wireless connections rely on a stable and reliable network for seamless operation.
- Follow the specific instructions provided by the manufacturer for your laptop or external display to enable and set up the wireless connection technology. These instructions may vary depending on the device, operating system, and wireless technology.
By following these guidelines, you can establish a wireless connection between your laptop and the TV or external monitor, enjoying the benefits of a cable-free experience.
Troubleshooting Connection Issues
While connecting your laptop to a TV or external monitor, you may encounter common connection issues that can hinder the seamless operation of your setup. Here, we will explore some of these issues and provide tips to diagnose and fix the problems.
Common laptop to TV/monitor connection issues
No signal on the TV or external monitor: Double-check that the correct input source is selected on the TV or external monitor. Ensure that the connection cables are securely plugged into both devices. If using an adapter, verify the compatibility and proper connection of all components.
Poor or distorted video/audio quality: Verify that the cables used for the connection are in good condition and not damaged. Faulty cables can result in poor video or audio quality. Additionally, check the resolution and display settings on your laptop, ensuring they match the capabilities of the TV or external monitor.
Flickering or unstable display: If the display is flickering or unstable, it may indicate a loose or improper connection. Ensure that all connection cables are securely plugged into their respective ports. If using adapters, confirm their compatibility and proper connection.
Tips to diagnose and fix the problems
When troubleshooting connection issues, consider these tips to diagnose and fix the problems:
Check cables and connections: Inspect the cables for any signs of damage or loose connections. Reconnect cables firmly and ensure they are securely plugged into their respective ports.
Restart devices: Try restarting both your laptop and the TV or external monitor. This can help refresh the connection and resolve any temporary issues.
Update drivers and software: Ensure that your laptop’s graphics drivers and any relevant software are up to date. Outdated drivers or software can cause compatibility issues and result in connection problems.
Test with different cables or adapters: If possible, try using different cables or adapters to verify if the issue lies with a faulty cable or adapter. This can help identify and replace any defective components.
Verify compatibility: Double-check that all devices, including your laptop, TV, or external monitor, are compatible with the selected connection method (e.g., HDMI, VGA, DVI, Miracast, AirPlay). Consult the user manuals or manufacturer’s websites for compatibility information.
Consult manufacturer support: If the problems persist, consult the support resources provided by the manufacturers of your laptop, TV, or external monitor. They can offer additional troubleshooting steps or assistance tailored to your specific setup.
By following these tips, you can effectively diagnose and fix common laptop to TV or external monitor connection issues, ensuring a reliable and seamless computing experience.
In conclusion, connecting your laptop to a TV or external monitor opens up a world of possibilities, allowing you to enjoy an enhanced visual experience and increase productivity. By understanding the available ports, choosing the right connection cable, setting up the hardware connections, and configuring your laptop settings, you can connect your devices seamlessly. Additionally, utilizing wireless connection technologies such as Miracast or AirPlay offers the convenience of a cable-free experience. In case of any connection issues, troubleshooting tips can help diagnose and fix common problems, ensuring a reliable and enjoyable computing experience on a larger display. So go ahead, connect your laptop to a TV or external monitor, and elevate your digital experience to new heights.


