


If you’ve recently purchased a desktop external hard drive and are wondering how to connect it to your laptop, fret not! In this article, we will guide you through the simple steps to seamlessly connect your desktop external hard drive to your laptop. Whether you need extra storage space or want to transfer files between your devices, we’ve got you covered. So, grab your cables and get ready to effortlessly connect and maximize the potential of your desktop external hard drive.
Choosing the Right Connection Type
When it comes to connecting a desktop external hard drive to your laptop, there are several connection types to choose from. Each connection type offers different speeds and compatibility, so it’s important to choose the right one for your specific needs. The four most common connection types are USB, eSATA, Thunderbolt, and FireWire. Let’s take a closer look at each one.

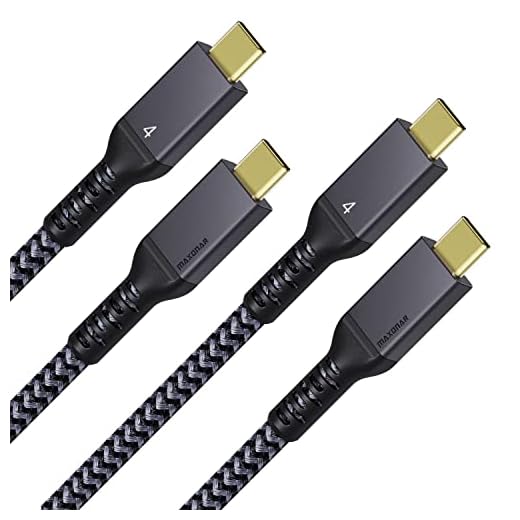
USB
USB (Universal Serial Bus) is the most widely used connection type for external hard drives. It offers a good balance between speed and compatibility, making it suitable for most users. USB 3.0 is the latest and fastest version available, capable of transferring data at speeds of up to 5 gigabits per second (Gbps). However, if your laptop doesn’t have a USB 3.0 port, you can still use an external hard drive with a USB 2.0 port, which has a maximum speed of 480 megabits per second (Mbps).
eSATA
eSATA (External Serial Advanced Technology Attachment) is another popular connection type for external hard drives. It provides faster data transfer speeds compared to USB, making it ideal for tasks that involve large file transfers, such as video editing or gaming. However, not all laptops have eSATA ports, so you’ll need to check if your laptop supports this connection type before choosing an external hard drive with an eSATA port.
Thunderbolt
Thunderbolt is an ultra-fast connection type designed for professional users who require lightning-fast data transfer speeds. It combines high-speed data transfer and video output capabilities into a single cable, allowing you to connect multiple devices, including external hard drives, displays, and audio interfaces, all with a single Thunderbolt port. However, Thunderbolt ports are not as common on laptops as USB or eSATA ports, so make sure your laptop has Thunderbolt compatibility before opting for a Thunderbolt external hard drive.
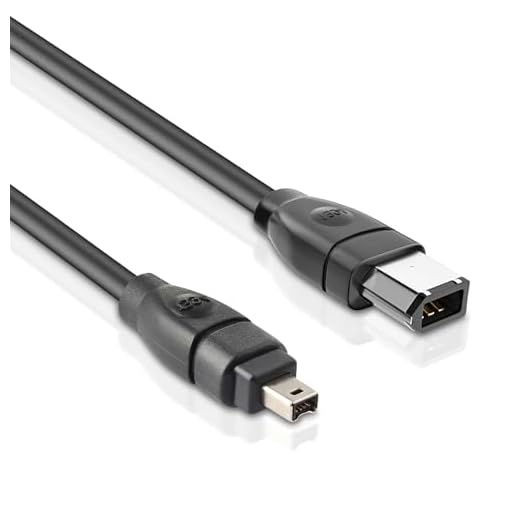
FireWire
FireWire, also known as IEEE 1394, is an older connection type that was commonly used before USB became widely available. It offers decent data transfer speeds and is still compatible with some older laptops and devices. However, FireWire has been largely phased out in recent years, and many newer laptops no longer include FireWire ports. If your laptop does have a FireWire port, you may consider using a FireWire external hard drive, but keep in mind that it may not be as widely supported or as fast as USB, eSATA, or Thunderbolt.
Checking Compatibility
Before you connect your external hard drive to your laptop, it’s important to check for compatibility. There are two main aspects of compatibility to consider: operating system compatibility and power requirements.
Operating System Compatibility
Different external hard drives may have different compatibility requirements when it comes to operating systems. Some drives are designed specifically for Windows-based systems, while others are optimized for Mac or Linux. It’s essential to choose an external hard drive that is compatible with the operating system of your laptop. Fortunately, most modern external hard drives are compatible with multiple operating systems, but it’s always a good idea to double-check before making a purchase.
Power Requirements
External hard drives typically require power to function properly. Some drives draw power directly from your laptop via the connection cable, while others require an external power source, such as an AC adapter. Before connecting your external hard drive, make sure you understand its power requirements and ensure that your laptop can provide the necessary power or that you have the required external power source. Failure to meet the power requirements may result in the drive not functioning correctly or not being recognized by your laptop.

Preparing the External Hard Drive
Before connecting the external hard drive to your laptop, it’s important to ensure that it is functioning properly and to take steps to protect your data.
Checking for Proper Functioning
Before connecting your external hard drive, it’s a good idea to perform a quick check to ensure that it is functioning properly. Inspect the drive for any physical damage, such as dents or scratches, that could indicate potential issues. Additionally, listen for any unusual noises, as this could be a sign of a faulty drive. If you suspect any issues with the drive, it’s best to contact the manufacturer for further assistance.
Formatting the Drive
If your external hard drive is brand new or has never been used with your laptop before, you may need to format it before it can be recognized by your laptop’s operating system. Formatting erases all data on the drive, so make sure to back up any important files before proceeding. The process for formatting a drive may vary depending on your operating system, but it usually involves accessing the Disk Management tool on Windows or the Disk Utility tool on Mac. Follow the instructions provided by the respective operating system to format the drive correctly.
Data Backup
Before connecting your external hard drive to your laptop, it’s always a good idea to back up any important data you may have on your laptop’s internal storage. This ensures that your data is protected in case of any unforeseen issues with the external hard drive. You can back up your data to an external storage device, such as a USB flash drive or another external hard drive, or you can use cloud storage services to store your files safely online. Remember, it’s better to be safe than sorry when it comes to your valuable data.
Connecting the External Hard Drive to the Laptop via USB
Connecting your external hard drive to your laptop via USB is the most common and straightforward method. Here’s how you can do it:
Determining the Type of USB Port
First, you’ll need to determine the type of USB port on your laptop. As mentioned earlier, USB 3.0 offers faster data transfer speeds than USB 2.0, so if your laptop has a USB 3.0 port, it’s recommended to connect your external hard drive to that port for optimal performance. You can identify USB 3.0 ports by looking for a blue-colored tab inside the port.
Connecting the USB Cable
Once you’ve identified the appropriate USB port, connect one end of the USB cable to the external hard drive and the other end to the USB port on your laptop. Make sure the connection is secure and that the cable is plugged in fully.
Recognizing the Drive on the Laptop
After connecting the USB cable, your laptop should recognize the external hard drive and automatically assign it a drive letter. If the drive does not appear automatically, you may need to manually assign a drive letter by accessing the Disk Management tool on Windows or the Disk Utility tool on Mac. Once the drive appears on your laptop, you can start using it to store and access your files.

Connecting the External Hard Drive to the Laptop via eSATA
eSATA offers faster data transfer speeds than USB, making it a preferred choice for tasks that involve large file transfers or require high-performance storage. Here’s how you can connect your external hard drive to your laptop via eSATA:
Verifying eSATA Support
Before attempting to connect your external hard drive via eSATA, you’ll need to verify that your laptop supports this connection type. Look for an eSATA port on your laptop, usually located either on the side or back. If your laptop doesn’t have an eSATA port, you won’t be able to connect your external hard drive using this method.
Connecting the eSATA Cable
Once you’ve confirmed that your laptop has eSATA support, connect one end of the eSATA cable to the external hard drive’s eSATA port and the other end to your laptop’s eSATA port. Ensure that the connections are secure and fully plugged in.
Mounting the Drive on the Laptop
After connecting the eSATA cable, your laptop should recognize the external hard drive and automatically mount it. You should now be able to access the drive and use it to store or retrieve your files. If the drive doesn’t appear, you may need to open the Disk Management tool on Windows or the Disk Utility tool on Mac and manually mount the drive.

Connecting the External Hard Drive to the Laptop via Thunderbolt
Thunderbolt offers lightning-fast data transfer speeds and is commonly used in professional settings. Here’s how you can connect your external hard drive to your laptop via Thunderbolt:
Checking for Thunderbolt Port
First, you’ll need to check if your laptop has a Thunderbolt port. Thunderbolt ports are not as common on laptops as USB or eSATA ports, so there’s a chance that your laptop may not have this port. Look for a port that resembles a mini DisplayPort or a USB-C port with a lightning bolt symbol next to it.
Connecting the Thunderbolt Cable
If your laptop does have a Thunderbolt port, connect one end of the Thunderbolt cable to the external hard drive and the other end to your laptop’s Thunderbolt port. Ensure that the connections are secure and fully plugged in.
Recognizing the Drive on the Laptop
Once the Thunderbolt cable is connected, your laptop should recognize the external hard drive and mount it automatically. If the drive doesn’t appear, you may need to manually mount it using the Disk Management tool on Windows or the Disk Utility tool on Mac. After the drive is recognized, you can start using it for your storage needs.

Connecting the External Hard Drive to the Laptop via FireWire
FireWire, although less commonly used nowadays, can still be an option if your laptop has a FireWire port. Here’s how you can connect your external hard drive to your laptop via FireWire:
Checking for FireWire Port
First, verify if your laptop has a FireWire port. FireWire ports are typically smaller than USB ports and will have either a 4- or 6-pin connector. Check the sides or back of your laptop for a port that matches this description. If your laptop doesn’t have a FireWire port, you won’t be able to connect your external hard drive using this connection type.
Connecting the FireWire Cable
If your laptop does have a FireWire port, connect one end of the FireWire cable to the external hard drive and the other end to your laptop’s FireWire port. Make sure to insert the connector correctly and secure the connection.
Mounting the Drive on the Laptop
After connecting the FireWire cable, your laptop should recognize the external hard drive and automatically mount it for use. If the drive doesn’t appear, you may need to manually mount it through the Disk Management tool on Windows or the Disk Utility tool on Mac. Once the drive is mounted, you can start utilizing it to store and retrieve your files.
Troubleshooting Connection Issues
If you encounter any issues while connecting your external hard drive to your laptop, don’t worry. Here are some troubleshooting steps you can take to resolve common connection issues:
Updating Drivers
Ensure that you have the latest drivers installed for your external hard drive and your laptop’s ports. Manufacturers often release driver updates to improve compatibility and fix any known issues. Visit the manufacturer’s website for both your external hard drive and your laptop to see if any updated drivers are available for download.
Checking for Device Recognition
If your external hard drive is not being recognized by your laptop, try connecting it to a different USB, eSATA, Thunderbolt, or FireWire port, if available. Sometimes, a faulty port may be the cause of the issue. Additionally, you can try connecting a different external hard drive or device to your laptop’s port to check if the port is working correctly.
Troubleshooting Power Supply
If your external hard drive is not receiving sufficient power, it may not function correctly or be recognized by your laptop. Verify that the power requirements for your external hard drive are met and that you are using the appropriate power source, such as an AC adapter. If you are using a USB-powered external hard drive, try connecting it directly to a USB port on your laptop instead of using a USB hub, as some USB hubs may not provide enough power.
Safely Disconnecting the External Hard Drive
Once you’ve finished using your external hard drive, it’s essential to disconnect it safely to avoid data corruption or damage to the drive. The process for disconnecting depends on your operating system.
Ejecting the Drive (Windows)
If you’re using Windows, navigate to the system tray in the bottom-right corner of the screen and find the “Safely Remove Hardware” icon. Click on the icon and select your external hard drive from the list of connected devices. Windows will then notify you when it’s safe to disconnect the drive. It’s important to wait for this notification before unplugging the USB, eSATA, Thunderbolt, or FireWire cable.
Unmounting the Drive (Mac)
If you’re using a Mac, open the Finder and locate your external hard drive in the sidebar. Click on the eject symbol (⏏) next to the drive’s name to unmount it. After the drive disappears from the desktop and sidebar, it is safe to disconnect the cable.
Powering Off the Drive
In addition to safely disconnecting the external hard drive from your laptop, it’s a good practice to power off the drive when not in use. This helps prolong the lifespan of the drive and reduces the risk of data loss or corruption. Most external hard drives have a power button or switch that you can use to turn them off. Simply press the power button or slide the switch to the “off” position to power down the drive.
Tips for Maximizing Performance
To ensure optimal performance and longevity of your external hard drive, consider following these tips:
Defragmenting the Drive
Over time, files on your external hard drive can become fragmented, which can slow down performance. To counteract this, you can periodically defragment the drive to organize the files more efficiently. Windows has a built-in tool called Disk Defragmenter, while Mac has a similar tool called Disk Utility’s First Aid feature. Run these tools periodically to maintain optimal performance.
Keeping the Drive Cool
Excessive heat can damage your external hard drive and shorten its lifespan. Ensure that the drive is placed in a well-ventilated area, away from direct sunlight or other heat sources. If necessary, you can also invest in external cooling solutions, such as cooling pads or fans, to help dissipate heat and keep the drive cool.
Avoiding Physical Damage
External hard drives are delicate electronic devices, so it’s important to handle them with care to avoid physical damage. Avoid dropping or mishandling the drive, and use a protective carrying case or sleeve when transporting it. Additionally, make sure to unplug the drive and store it safely when not in use, keeping it away from potential hazards such as liquids or magnetic fields.
In conclusion, connecting a desktop external hard drive to your laptop involves choosing the right connection type, checking compatibility, preparing the drive, and properly connecting it to your laptop. USB, eSATA, Thunderbolt, and FireWire are some common connection types, each with its own advantages and compatibility considerations. It’s important to check the operating system compatibility and power requirements of your external hard drive before connecting it to your laptop. Once connected, following proper disconnecting procedures, troubleshooting common issues, and maximizing performance can help ensure a smooth and efficient experience with your external hard drive.